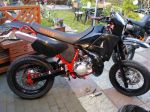
So here we are, figured i might aswell post this up.
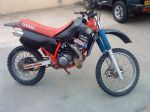
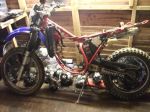
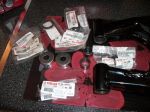
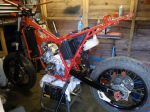
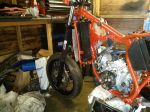
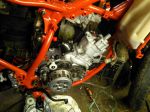
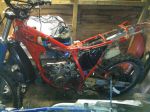
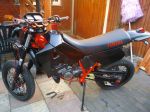
1988 build, does have some newer parts on it so a bit of a hybrid but i dont care not selling it(has 99 electrics). Had a lot of spares didnt see the point buying more parts.
Specs
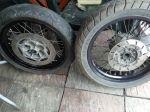
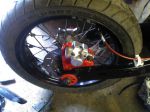
DTX wheels
3RM-20 CDI (no rev limiter)
boysen reeds
3MB Exhaust
DEP back can
28mm flatslide
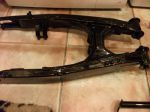
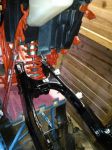
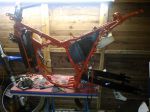
Before pictures
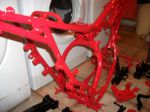
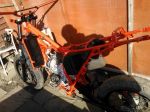
Here's where the bit's swapping starts!
-- Edited by NEV on Saturday 13th of April 2013 01:58:02 PM
-- Edited by MartZ0r on Saturday 13th of April 2013 10:03:11 PM
-- Edited by MartZ0r on Saturday 13th of April 2013 10:06:46 PM
-- Edited by MartZ0r on Saturday 13th of April 2013 10:10:30 PM
-- Edited by MartZ0r on Saturday 13th of April 2013 10:11:57 PM
Nice project pics Mart, coming on well that is, but can you edit the last couple of pictures so they go on separate lines, as it makes the thread page much too wide, cheers ta.
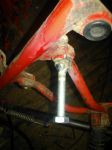
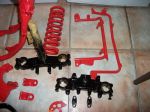
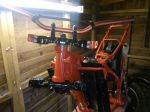
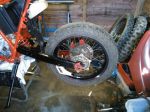
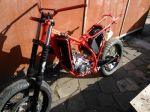
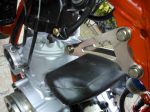
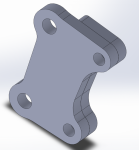
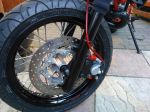
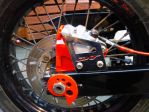
she's up and running sweet. Nearly done now i am having the fun of fitting the front wheel. i think i have it sorted though just need to check it over again before i laser cut & machine the parts.
I have to cur about 5mm off the thick part of the shank on the spindle to allow the spindle to go further into the wheel. Then i need to machine a collar to about 24.75mm from what i worked out.
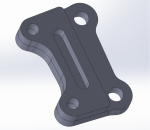
Then i need to cut and fit this
The top plate is 10mm stainless, the backing plate will creat a 10mm offset for the caliper cradle, and the Slot on the back is to fill with tig weld.
The fork mounting holes are 12mm because i need to tap out a thread into the forks for a m12 1.25 pitch bolt. there isnt enough room at the back of the forks to drop a nut onto it instead. Well, there is
but it's only a plain m10 nut and only leaves around 2mm clearance from the nut and the brake disk bolts on the hub.
-- Edited by MartZ0r on Monday 15th of April 2013 10:14:59 AM
gotcha, no worrys all done anyways. Nev, i know you had the TDR front end so yours is probably different but did you manage to get nuts on the back of your forks? like a nylock or something? just wondering how you bolted your plate to your forks
-- Edited by MartZ0r on Monday 15th of April 2013 10:47:13 AM
Aye Mart I managed to get a Nyloc nut behind the caliper mounting on the fork, but then again my bracket was only 6mm not 10mm, so I had a tad more room, as for the spacer, I used a m10 hex thread coupler halved, worked out about 15mm for each spacer, nice job you're doing there though, oh aye I had another front spindle made adding 13mm to the length of the shank, as there wasn't enough thread coming through the left hand fork. but like you say I went TDR front end. The problem I'm having at the minute is getting new wheel bearings for the 3 spoked wheels on my hybrid project, as the original bearing had a 12mm centre, now I need to find some bearings to take a 15mm spindle, so as to keep the DTR forks, I had thought they were TZR 3 spoked wheels, but the TZR speedo drive takes a 15mm spindle not a 12mm one, so must be off another type of Yamaha, but they're definitely Yamaha wheels.
-- Edited by NEV on Monday 15th of April 2013 12:42:43 PM
strange these yamaha'a, that must make things hard for themselves in production! so your offset was 15mm, mines working out at 10. Thats why you can get a nut on then. I need a DTX spoeedo before i go finally machining parts out incase it's any wider than a DTR one, but id imagine it's the same other than the gears inside.
Yes that hybrid of yours is some engineering. But then, by the standards of your DTR build no doubt you will figure it out.
You should be able to find some with the right internal bore and outside bore but they may be a bit wider.
What side does the loom go up at the front, the right side or the left? I know it goes up the left at the rear to the brake light etc, but I can't fit my mud guard on at the front because of the loom. :/